11/30/12

Roasted Garlic Hummus


This seems like an appropriate post-Thanksgiving post.  I mean, I will speak for myself here in that I ate WAY too much junk...and with Christmas cookies right around the corner I need to load up on fresh fruits and veggies while I have the willpower to do so.

I have made my own hummus several times but wasn't ever super thrilled with it because I felt like the tahini overpowered it and it wasn't ever very smooth.  So I continually buy the Sabra hummus at Sam's Club (like, every single week) because it's really good and a super cheap price there.  Then, I read the Pinch of Yum's hummus tutorial and gave homemade hummus another try.  This recipe is SO easy, VERY inexpensive and is SO SO good & creamy.  

If you head over to her site you'll see that she makes a huge point of peeling the skins off of the chickpeas, which I have never heard of, and sounded like a pain in the rear but I did it and they just pop right off!  (Note--it does take a little time.)  My four year-old "helped" me and we just tossed everything in the food processer and BAM, hummus.  We love garlic but if you're not into it you could certainly reduce the amount, leave it out or substitute a clove or two of raw garlic for the roasted.  


Roasted Garlic Hummus
recipe adapted from Pinch of Yum

4-6 cloves garlic
spray of oil
2 cans chickpeas, drained and rinsed
3 Tb. olive oil
1/2 c. water
sea salt to taste
dash of cumin
dash of smoked paprika

To roast the garlic preheat the oven to 350, peel the cloves and put in a small piece of foil. Spray with oil spray and wrap into a little packet.  Put in the oven for 20-30 minutes, check before removing.  The garlic is roasted when it is soft and golden-brown. Set aside.  In the meantime peel the chickpeas, just pinch them until the skins pop off and discard the skins.  Once the chickpeas are peeled and the garlic is roasted toss the chickpeas, garlic, salt, cumin, smoked paprika & olive oil into the food processer.  (If using a blender instead, pour a little water in first before the beans.) Process until smooth.  Then, slowly stream the water in until you get the desired consistency.  You may end up using more or less than 1/2 c. of water, just keep an eye on it.  Taste and adjust seasoning to your liking.  Serve with veggies, tortilla or pita chips, or flat bread.


post signature

11/26/12

Carrabba's Bread Dip Mix


We live in a somewhat new/smallish suburb of Phoenix and when we first moved out here, there wasn't much. When Carrabba's opened we were there.  Rob instantly became obsessed with their herb bread dip and insisted I find a way to make some.  Immediately.  So naturally I googled "Carrabba's bread dip mix" and up popped the copycat recipe!  I love this recipe because you mix up all of the dry herbs and it stays fresh pretty much forever so you can keep it on hand.  Mix some with fresh garlic and olive oil and you have an instant Italian appetizer.  I like to bring this to people with a homemade meal and everyone loves it.  Really, everyone.

This would make a great little gift for your neighbors in a small jar, and is super simple to throw together.  I usually buy my dried herbs in the little packets on the Mexican food aisle.  They are super cheap ($.89.)

Carrabba's Bread Dip Mix
recipe from food.com

1 Tb crushed red pepper flakes
1 Tb. black pepper
1 Tb. dried oregano
1 Tb. dried rosemary
1 Tb. dried basil
1 Tb. dried parsley
1 Tb. granulated garlic
1 tsp. sea salt
fresh garlic cloves & olive oil for serving

Mix all herbs & salt together in a small bowl.  Store in a jar or ziploc bag until you're ready to use.  To serve, crush or grate a clove of garlic on a plate and mix 1 Tb. herb mix in with the garlic.  Cover with desired amount of olive oil and dip a baguette or french bread in the oil mixture. 

post signature

11/20/12

Roasted Beets & Brussels Sprouts Salad with Goat Cheese


When Rob and I were first dating and married his photo lab was in the same shopping center as a little Italian food place called Babbo.  We ate there a lot.  Like, a LOT. It may or may not have contributed to my 15 lb weight gain our first year married.  Then we moved out to a suburb and were so excited when they opened a Babbo a few miles from our house a couple years ago.  Unfortunately the one bummer part about having three small children is we just really can't eat out very often on account of the emotional duress we face when sitting still in public with them.  BUT a few weeks ago my mom was in town and she babysat so we could go out and we ate this salad at Babbo....it. is. so. good.  They had it paired with a champagne vinaigrette which is to die for, kind of sweet, kind of tart--just so good!  I had to make it at home.  

We ate this for dinner one night with a piece of crusty bread and we both loved it.  If you wanted extra protein some grilled chicken would be really good on this too. I paired it with a vinaigrette I love from Our Best Bites.  I have to warn you that beets die your skin, your counters and your goat cheese, so deal carefully with them, but they are so good! I think if you were in a pinch and wanted to sub a can of no salt-added whole beets and just chop them up and roast them for a minute it would work fine too.

Roasted Beets & Brussels Sprouts Salad with Goat Cheese

For four dinner-sized or one large family-style salad:
3-4 Tb olive oil
1 lb brussels sprouts, rinsed and quartered
3 large beets, cleaned and peeled and chopped
4-6 Tb.sliced almonds
4-6 Tb. dried cranberries
1/2 red onion, thinly sliced
about 12 c. spring mix or field greens
6 oz soft goat cheese

Heat oven to 420.  I needed to use two cookie sheets, but it will depend on how many veggies you have and whether or not you're roasting the beets.  Spread a thin layer of the brussels sprouts and beets.  Roast for 20-35 minutes, stirring in the middle, until the brussels sprouts are golden and somewhat crispy and the beets are soft. (The beets may take longer.) Remove from the oven and make the dressing while the veggies cool a bit.  To make the salad layer greens, brussels sprouts, beets, almonds, cranberries, red onion and goat cheese.  Drizzle with dressing and serve immediately.


Honey Red Wine Vinaigrette
recipe from Our Best Bites

1/2 c. red wine vinegar
1/2 c. honey
2 cloves garlic, chopped
1 tsp. sea salt
1 tsp. black pepper
1 c. canola oil

Combine vinegar, honey, garlic, salt & pepper in the jar of your blender.  Run the blender until everything is combined.  Turn the blender to low and slowly stream the oil in while the blender is running.  Pour the dressing into a jar and refrigerate up to a month.  (It will never last that long because it is so yummy:)
 
post signature

11/17/12

Thanksgiving is around the corner!


I can't believe how quickly November has flown by! We are excited about planning for Thanksgiving and I wanted to organize some great holiday food.  These should get you off to a good start if you're cooking for Thanksgiving and need some simple ideas.

    Cranberry Salsa.  This is super over some cream cheese or just plain with tortilla chips!


    1-2-3 Dip. So yummy and easy to throw together.


    Traditional Roasted Turkey. Don't be intimidated this is a very simple recipe!


    Creamy Mashed Potatoes. Great with or without gravy.


    Kale Salad. This can be made ahead of time which comes in handy when you're preparing multiple items for one day.


    Sweet & Salty Acorn Squash.  We love this, it's really simple to prepare with few ingredients and only needs to bake in the oven a few minutes just before serving.  Very Thanksgiving-ish!


    Truffled Green Beans. You can skip the mushrooms if that's not your thing.


    Strawberry Jello Salad.  This is a family tradition, wouldn't be Thanksgiving without it!


    Upside Down Pumpkin Pie.  Wouldn't be Thanksgiving without pumpkin something.  This is great because there's no dealing with delicate pie crust.


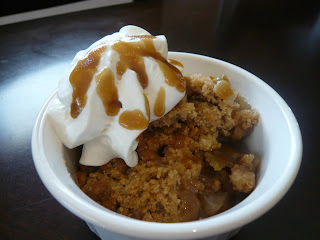
    Pear Crisp with Caramel Sauce.  We've had some really great pears the last few weeks and I made this for our Community Group, it's a hit. 


    Skinny Pumpkin Cookies.  These are a great idea if you're watching your waistline.


    Happy Eating!!


    http://pinterest.com/pin/create/button/?url=http%3A%2F%2Fcrackedupkitchen.blogspot.com%2F2012%2F11%2Fthanksgiving-is-around-corner.html&media=http%3A%2F%2F1.bp.blogspot.com%2F-z-oj6L4prHo%2FUKWn4r44r6I%2FAAAAAAAAARM%2FvWkqxCAzqI0%2Fs320%2Froasted%2Bturkey.JPG&description=Cracked%20Up%20Kitchen%3A%20Thanksgiving%20Menu%20Ideas


    post signature

    11/13/12

    Upside Down Pumpkin Pie

    My mother in-law made this one Thanksgiving about six years ago and I've made it every single year since then.  I now make it for both sides for Thanksgiving and sometimes on Christmas.  If you are a pie crust freak you might not prefer this recipe, but I personally am not obsessed with the traditional crust, so I love this!  This is super simple and quick to make and is a great end to a Thanksgiving feast.  One tip...don't forget to add the sugar.  I did that once recently, it's a little bitter!

    Upside Down Pumpkin Pie
    • 1 28 oz can pumpkin puree (NOT pumpkin pie filling) or 2 14 oz cans
    • 3 eggs, beaten
    • 1 12 oz can evaporated milk
    • 1 1/4 c. sugar
    • 2 tsp cinnamon
    • 1 tsp. nutmeg
    • 1/2 tsp. ginger
    • 3/4 c. butter, melted
    • 1 yellow cake mix, dry
    • 1 1/2 c. chopped pecans or walnuts (optional)
    Preheat the oven to 350.  In a large bowl mix together pumpkin, eggs, milk, sugar and spices.  Pour the pumpkin mixture into a 9x13 pan.  Sprinkle the yellow cake mix on top and use a fork to smooth out all lumps.  Drizzle the butter over the top of the cake mix and bake for 30 minutes on the middle oven rack.  If using nuts, remove the pie from the oven and sprinkle the nuts on, bake for another 30 minutes. (Bake for 60 minutes total regardless of using nuts or not.)  Remove from the oven and let cool completely before serving.  Top with freshly whipped cream or Cool Whip.

    http://pinterest.com/pin/create/button/?url=http%3A%2F%2Fcrackedupkitchen.blogspot.com%2F2012%2F11%2Fupside-down-pumpkin-pie.html&media=http%3A%2F%2F1.bp.blogspot.com%2F-iVcvxaCnWU4%2FUKLvE7odBjI%2FAAAAAAAAAPs%2FkxjDtk4VH8M%2Fs640%2FP1010939.JPG&description=Cracked%20Up%20Kitchen%3A%20Upside%20Down%20Pumpkin%20Pie

    post signature

    11/11/12

    Pinspiration: Burlap Wreath


     I can't explain why, but I am so in love with burlap.  I just want it to be everywhere! Last fall I was investigating making my own fall wreath and I fell in love with this bubble burlap wreath on Pinterest.  My friend and I went and bought the necessary supplies.  Later, I cut the burlap into strips and then into small squares, creating a gigantic mess all over everything, vacuumed for half an hour, and then attempted to pin the bubbles.  I got confused and then gave up.  (My friend's bubble wreath turned out perfectly, so we know it is possible!)


    Then, I decided to find something simpler.  So I found this tutorial for the ruffled burlap wreath.  Looked super simple, so I went out armed with my Michael's, JoAnn and Hobby Lobby coupons, bought all of the supplies for this wreath, stuffed it into my junk cupboard and never followed through.  Sigh.  Sounds like the opposite of a high-functioning frugal girl, huh? Well....September 2012 rolled around and I was NOT going to let fall go by again with these wreath supplies lying around.  I made the ruffled wreath one afternoon and it was not difficult at all.  Keep in mind that I have never successfully sewed a button on or mended a hole in a garment, so the ruffling must be easy.

    After reading a few tutorials on making fabric flowers--here and here, I made a couple flowers out of a scrap of fabric and an old sweater with a hole in it.  Then I painted the "L" with some leftover house paint and found that cute denim flower for $2 in the scrapbooking department at Hobby Lobby, overall coupons included I spent approximately $11 on the wreath.  Not too shabby for something I can use several years!

    My sister really liked the wreath and wanted to make her own, but hadn't gotten to it, so for her birthday I made the wreath below for her.  She had mentioned she wanted something even simpler than the ruffle wreath, and she loved the final product.

    For the wreath below the supplies needed are:

    • Straw or foam wreath, this straw one was probably 18'' diameter
    • 3/4 yard of burlap, cut into 2 1/2 inch strips
    • hot glue gun & glue sticks
    • pins
    • fabric flowers--I used 1/8th yard of the brown patterned fabric, 1/8th yard of the cream colored fabric, a leftover strip of brown burlap, & and a few pieces of denim from an old holey pair of jeans
    • a cardboard star ornament ($.68 at Hobby Lobby)
    • any other embellishments you'd like: wooden cutout shape or letter, etc.
    • ribbon of your choice to wrap for attachment to a hook or holder.
    Steps to make the wreath:

    1. Wrap the wreath with strips of burlap or other fabric, hot gluing on the back as you go.  Once the entire wreath is covered go back and add some pins over the back of the wreath to keep the fabric even more securely in place.
    2. Make your rolled fabric flowers or fabric roses (I take no credit for these ideas, these tutorials helped me greatly!)
    3. Lay your flowers, embellishments, wooden cutouts, etc. on the wreath to see where you want them.  Glue or pin to secure your flowers.
    4. Wrap a piece of ribbon around the wreath and tie to make the hook/holder attachment.  This part is great because it's easy to exchange out ribbons to bring out different colors.
    Cost of the wrapped burlap wreath:
    $3 for the actual straw wreath (used my 50% off Michael's coupon)
    $4 for burlap from Walmart
    $1.75 for cream colored fabric from Walmart
    $.69 for the brown fabric @ Hobby Lobby (sale that week)
    $.69 for the cardboard star ornament
    $1.00 in glue sticks (I used a lot of glue sticks on this!)

    11/10/12

    BBQ Chicken Nachos with BBQ Chipotle Ranch


    We like bbq chicken anything it seems.  So, when I was staring at a good amount of leftover grilled chicken I really wanted to mix it with barbecue sauce and this recipe was invented in that moment.  As weird as it sounds, we loved it.  My kids would eat almost anything on a chip and this was no exception. I used refried black beans but if that sounds strange to you plain black beans would be just perfect.  Some roasted corn would be really good on these also.

    BBQ Chicken Nachos

    • 1 12.5 oz bag tortilla chips (enough to cover a large cookie sheet)
    • 2 c. chopped chicken
    • 1/4-1/3 c. barbecue sauce (you don't want the chicken to be too soaked with bbq)
    • 3/4 c. refried black beans (or sub regular black beans)
    • 2 c. shredded cheddar or pepper jack cheese
    • 1/4 c. red onion, chopped
    • 1/2 c. chopped bell pepper, any color
    • 1/4 c. chopped cilantro
    • 1/2 c. ranch dressing
    • 1 tsp. chipotle puree (tutorial here)
    • 2 tsp. barbecue sauce

    Preheat the oven to 425.  Stir chicken and barbecue sauce together in a small bowl. In a separate bowl combine the ranch dressing, chipotle puree and 2 tsp. barbecue sauce. Spread the chips over a large cookie sheet in one layer.  Then sprinkle the chicken, black beans, cheese, onion and bell pepper over the chips.  Bake 10 minutes, keeping an eye that the chips don't brown too much.  Once the cheese is melted remove from the oven.  Sprinkle on the cilantro and drizzle the Chipotle BBQ Ranch over the top.


    post signature

    11/6/12

    Greek Hummus Pizza


    It seems like in the summer we do burgers 101 ways on the weekend, as it gets cooler and turns to fall we move to pizza 101 ways. This is my latest vegetarian favorite.  My kids ate hummus on a pizza and didn't cry, so I'd call that a success!

    I highly recommend roasting the veggies ahead of time so that when it's time to make the pizza you can just throw it all together!  Use any hummus that you love and if you're not into garlic you could just leave it off.  We love garlic and can't ever have too much of it!  Lately I've been making my own crust using the Fleischmann's Pizza Crust yeast because it's no-rise and super quick, but I still love the Trader Joe's dough ball--use whatever!

    Greek Hummus Pizza
    • 1 ball pizza dough
    • 2 roma tomatoes, sliced
    • 1/2 red onion, sliced
    • 1 bell pepper, sliced (or 1/2 of two different colored bell peppers)
    • 1/2 c. chopped artichoke hearts
    • 1 small can sliced black olives, drained well
    • 1/3 c. hummus
    • 2 garlic cloves, minced
    • 3/4 c. mozzarella
    • 1/3 c. crumbled feta

    Preheat the oven to 450 and layer the tomatoes, onion and pepper slices on a cookie sheet.  Bake for 40 minutes, stirring a couple times in the middle.  Remove roasted veggies from the oven and set aside for the pizza.  When you're ready to make the pizza preheat the oven to 425 and roll the dough out on a stone.  Pre-bake the crust for 7 minutes.  While the crust is baking, mix the hummus and garlic together in a small bowl.  Remove crust from oven and spread the hummus over the top.  Layer on the veggies, artichoke hearts and olives.  Sprinkle the cheeses on the top and bake another 10-12 minutes or until the cheese is melted and crust is golden brown.

    http://pinterest.com/pin/create/button/?url=http%3A%2F%2Fcrackedupkitchen.blogspot.com%2F2012%2F11%2Fgreek-hummus-pizza.html&media=http%3A%2F%2F4.bp.blogspot.com%2F-Vhdh0wzgL5g%2FUKEZ9ddUqTI%2FAAAAAAAACFA%2FrO0gyY_pv4A%2Fs1600%2FP1010747.JPG&description=Cracked%20Up%20Kitchen%3A%20Greek%20Hummus%20Pizza%2C%20Vegetarian
    post signature

    11/1/12

    Pumpkin & Butternut Squash Chili


    I follow Our Best Bites like a stalker.  Every recipe of theirs that I have ever tried has been a win.  I bought my sister their first cookbook last year and got her hooked on them as well, so last Thanksgiving we tried many recipes--you can't go wrong.  I'm officially putting their second cookbook on my Christmas list! ...So, when they posted a recipe for Black Bean and Sweet Potato Turkey Chili a couple of weeks ago, both my sister and I noticed it right away. 

    We have been trying to eat a more plant-based diet so I tried this as a vegan recipe and made a few alterations to include butternut squash and it was a hit.  My husband is definitely a carnivore but he raved and raved about this and took it for lunch the next day.  All that to say, if you couldn't care less about being vegetarian, vegan, or eating your veggies, you could actually like this!  Don't freak out that it has a can of pumpkin in it...it doesn't even taste like pumpkin AT ALL.


    Pumpkin & Butternut Squash Chili
    adapted from Our Best Bites

    1 Tb. oil
    1 large onion, chopped--any color is fine
    1 bell pepper (any color) or poblano, chopped
    2 jalapenos, seeded and minced
    4 cloves garlic, minced
    8 oz button mushrooms, chopped
    3 1/2-4 c. butternut squash, chopped (about half of a large butternut squash)
    2 cans black beans, drained
    1 can pinto or Northern beans, drained
    1 15 oz can 100% pure pumpkin puree
    2 tsp. smoked paprika
    2 tsp. cumin
    1 1/2 tsp. sea salt
    1 tsp. oregano
    1 tsp. chili powder
    1/2 tsp. pepper
    1 28 oz can diced tomatoes, undrained
    32 oz vegetable stock (beef or chicken stock would be perfect too)

    Heat a stock pot over medium heat and drizzle in the olive oil. Saute onions, peppers and mushrooms until they just begin to soften.  Add in garlic and butternut squash and saute another 4-5 minutes.  (At this point you could absolutely pour everything into a crockpot and cook on low all day.) Stir in beans, pumpkin, seasonings, tomatoes and stock. Bring to a simmer and lower heat to medium-low and cook another hour or until butternut squash is soft, stirring frequently.  Serve with cornbread, topped with cilantro, avocado and/or sour cream if you're so inclined.


    http://pinterest.com/pin/create/button/?url=http%3A%2F%2Fcrackedupkitchen.blogspot.com%2F2012%2F11%2Fpumpkin-butternut-squash-chili.html&media=http%3A%2F%2F1.bp.blogspot.com%2F-IXgB3CRgBJw%2FUJMT7OymlAI%2FAAAAAAAAAOE%2Fb2So7QPqjSM%2Fs1600%2Fbutternut%2Bsquash%2Bchili2.JPG&description=Cracked%20Up%20Kitchen%3A%20Pumpkin%20%26%20Butternut%20Squash%20Chili%2C%20Vegan